How I made my Aoi no Exorcist (Shiemi Moriyama) costume
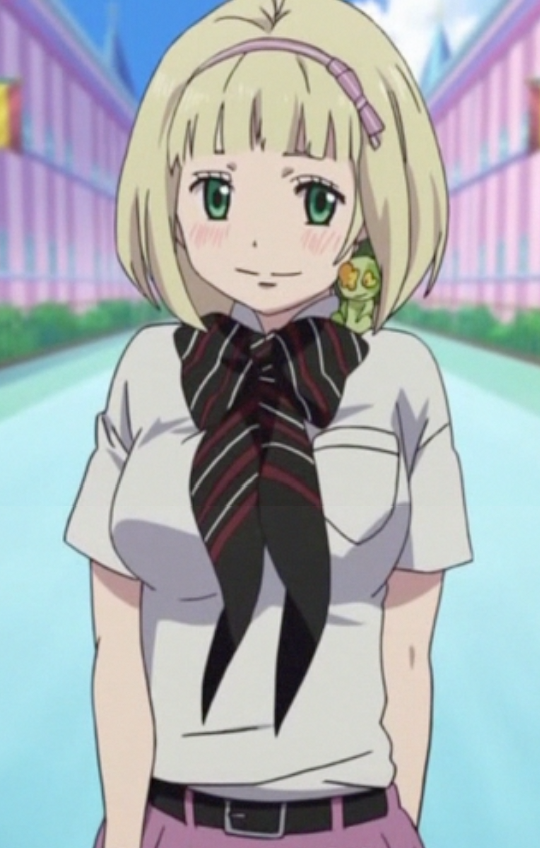 A couple of months back, along with BanditYing and Cvy, I cosplayed as Moriyama Shiemi from the series, Ao no Exorcist. Here with an entry to share how I made her summer school uniform ^^
I must apologize that as I was in such a rush to make the costume, I didn’t have the luxury of snapping photos at every stage. Henceforth, some parts of the costumes might not be explained in depth. Either way, I hope the entry will help give you a bit of head start if you ever intend to make Shiemi’s School Uniform. Enjoy!
Box Pleated Skirt
Check out this entry to learn how to make a Knife pleated skirt.
Her skirt seemed like a box pleated skirt to me so I folded my pleats in a different way from the video. I used really cheap cotton and very much regretted it after as the skirt was so light the breeze kept bringing it up! Below are some pictures to share how I made the skirt.


Cut 2 long strips of cloth. The width of the skirt would be your skirt length + an extra inch of of edging. Box pleat them and hold the pleats in place with bobby pins.


Sew one side of the pleats down with a loose running stitch.

Sew both pieces together by the side. This will form one long strip of pleated fabric.

Cut off any extra fabric/pleats and then sew the hems.

Now, sew the zip on.


Basically, the pictures above shows how you are supposed to flip the zip to the other side and sew it down. I’m sorry but I don’t know how to explain the zip sewing part … let’s hope the pictures helps ^^ ;;;

Make 2 markings (top and bottom of where the zip goes) on the fabric so you will have a visual guide.

Sew it down! If your Sewing Machine has a special footer for zips, then change your footer before sewing. If your machine doesn't come with that, it’s fine too. It just takes a little more effort to get it done.


This is how it would look when you’re done. Continue the same steps with the other side of the zip.

After you’re done with the zip, this is roughly how the skirt would look like  If you’re rushing for time or if your costume cannot see the band of the skirt, you can even skip the band and stop at this stage.

Length = Waist circumference + 2” (for the overlapping portion at the hook )
Width = 1” (Or how big u want your band to be) x 2 + 1” (extra edging for sewing)
The waist band is a long strip of rectangle fabric. Sew it on to the top of the skirt and you’re done! For more in-depth explanation, read this blog entry.
Collar Ribbon
I made her neck Ribbon by sticking ribbons diagonally on a navy blue fabric. Click here to see another blog entry on how to make beautiful butterfly bows.


This is the butterfly ribbon part. The other half of the fabric without any ribbons stuck on will be the underside of the ribbon. Which is why it doesn’t need any ribbon(the red and white ribbons) decoration.
Yep, using too much glue gives a really yucky effect =\


These are the tails of the ribbon.

The fabric piece with lesser ribbons (indicated in the photo above) stuck on it will be tied to the middle of the bow. It will also be used to tie the bow and tails together.

To make the collar ribbon lasting, I made sure I hand sew the necessary pieces together to avoid any costume malfunction. For wearing convenience, I then hot glued a big safety pin onto the back of it so I can wear it as a brooch.
Ni-Chan Plushie
I have never made a Plushie before so I was really worried about making her Guardian Demon Prop. But since it was such a simple costume, It felt really unconvincing if I didn’t have her Ni-Chan with her.
Personally, I really like Ni-chan and Shiemi. They are the type that gets overlooked because of their appearance even though both are surprisingly strong and useful!
With some suggestion from a friend, I decided to make my Ni-Chan out of socks. Not the best texture but I guess I could live with it


Ni-Chan’s right hand is a darker shade of green hence I used another pair of socks to make his right arm.


I drafted his eyes on paper and cut them out to gauge the proportion. After I’m satisfied with the size and shape of it, I use the paper as a template and cut out a piece of compressed felt. I used markers to draw the details of the eyes and then glued them onto the face with fabric glue.
I attempted to mimic the darker colour patches on Ni-Chan by marking it out with a dark green marker but the nylon fabric absorbed most of it =(


To make my Ni-chan more photo friendly, I also inserted wires inside his hands to make him pose-able. A big marble is also inserted into his abdominal via the erm, space between his thighs, to give him some weight to sit down firmly.
Belt, Socks, and Blouse
The rest of the costume were pretty much store bought =) Bought my belt from Daiso and my opaque tights from a Socks shop in Bishan Junction 8. Hope this information helps!
============
P/s: The wig I used here belongs to Cvy ^^
Comments
THANK YOU!
Thank you again!! <3 x
But otherwise this is good tutorial and good for me too BC I have like month for the next con and I am trying to make shiemi.